


Product Features


Cabinet Materials & Construction

OUR STAINING PROCESS
Our stained cabinet doors and face frames are made using the finest quality solid birch wood.
We begin by using using a combination of automatic sanding machines and hand detailing to ensure a smooth finish.
Application of equalizer's and toners are used to balance the color of the wood and ensure a uniform color throughout.
Automatic spraying machines ensures the stain is embedded deep into the cabinet, which highlights the natural wood grain.
All stained surfaces are then hand-rubbed and wiped down to remove excess stain. Then left to air dry.
Once the stain has dried, a wood sealer is applied to provide even protection.
We then sand the surfaces to provide a smooth and consistent finish. Our final protective coat is applied to maximize resistance to scuffing, moisture, fading and most household chemicals.
The cabinets are then placed through a color consistency examination where additional touch-ups are made where needed.
OUR PAINTING PROCESS
Our painted cabinet doors are made with high density fiberboard (HDF) - painted faceframes are made with the finest quality solid birch wood.
We begin by using using a combination of automatic sanding machines and hand detailing to ensure a smooth finish.
Clear primer is applied and an automatic sanding machine is used to ensure an even and smooth surface.
The first base coat is the applied and then dried using a specialized drying machine.
The base coat is then sanded and vacuumed to remove any excess dust. We then apply our second base coat and then dried using a specialized drying machine.
We then sand the surfaces until smooth and consistent.
Our final top coat is applied to maximize resistance to scuffing, moisture, fading and most household chemicals.
The cabinets are then inspected and additional touch-ups are made where needed


Maintenance and Care
General Information:
-
Keep all cabinet surfaces dry at all times.
-
Cabinetry surfaces should be dried immediately with a soft microfiber cloth after cleaning.
-
As with all solid wood products͖ drastic changes in temperature or humidity can be harmful to the cabinet finishes and over-all structure.
Basic Cleaning:
-
After installation wipe the interior and exterior of the cabinets with a soft damp cloth and dry immediately with another clean, soft cloth.
-
For routine cleaning͖ use a soft, clean cloth dampened with warm water - if the water alone does not clean cabinets completely, mix a mild dishwasher soap with the water.
-
Wipe up food spills and water spots promptly with a damp cloth or sponge and dry the surface immediately.
-
For best results - use a blotting motion rather than a wiping motion to remove the substance.
Cleaning of Glass Door Inserts:
-
Use an ammonia-free glass cleaner with a soft clean microfiber cloth.
-
Spray glass cleaner on a clean microfiber cloth or paper towel.
-
Avoid spraying the glass cleaner directly on the glass - this is to prevent glass cleaner running into the joints of the cabinets
Basic Care & Things to Avoid:
These products and ingredients can damage the cabinetry. Please avoid use of the following͗:
-
Scouring Pads
-
Steel Wool
-
Ammonia
-
Nail Polish Remover
-
Paint Thinners
-
Bleach
-
Never leave a cloth saturated with cleaner or water on any cabinet surfaces.
-
Avoid using an excessively damp cloth over exterior and interior of cabinetry.
-
When using small kitchen appliances that produce heat and/or steam always pull them away from the underside of cabinetry to prevent damage to the cabinets.
-
Always remember to turn on the ventilation while cooking.


Cabinet Codes
Cabinet codes use a letter and a number system to represent style, cabinet type, size and options.
See below for specific cabinet code examples by cabinet type.
Base Cabinet Code Example:
SW-DB36
Shaker White - Drawer Base, 36"W
All Base cabinets are 24"D x 34.5"H
Wall Cabinet Code Example:
SW-W3036
Shaker White - Wall Cabinet, 30"W x 36"H
All wall cabinets are 12"D
Wall Pantry Cabinet Code Example:
LG-WP1584
London Grey - Wall Pantry, 15"Wx84"H
All wall pantry cabinets are 24"D
Refrigerator Wall Cabinet Code Example:
LG-W301824
London Grey - Refrigerator Wall Cabinet
30"Wx18"Hx24"D
All refrigerator wall cabinets are 24"D
Microwave Wall Pantry Code Example:
YW-MWP279024
York White - Microwave Wall Pantry
27"Wx90"Hx24"D
All microwave wall pantry cabinets 24"D
Bathroom Vanity Code Example:
SG-VDB1521-3
Shaker Grey - Vanity Drawer Base
15"W - 3x Drawers
All bathroom vanity cabinets are
34.5"H x 21"D
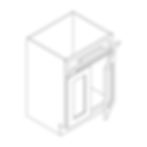
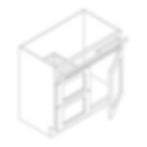
BASE CABINETS
B - Base Cabinets
DB - Drawer Base
SB - Sink Base
LS - Lazy Susan
BBC - Blind Corner Base
CSB - Corner Sink Base
MDB - Microwave Drawer Base
TB - Tray Base
SP - Spice Pull
BEC - Base End Cabinet
BES - Base End Shelf
PANTRY & OVEN CABINETS
WP - Wall Pantry Cabinet
MWP - Microwave Wall Pantry
OC - Oven Cabinet
STORAGE & ORGANIZATION
RD - Roll out Tray
PNL - Finished Plywood Shelf
FD - File Drawer Cabinet
WRES - Wine Rack Euro Style
WR - Wine Rack
GR - Glass Rack
KD - Knee Drawer
PANELS & FILLERS
DWR - Dishwasher Return Panel
REF - Refrigerator End Panel
BP - Finishes Skin Panel
FB - Finished Plywood
BEPL - Base End Panel Left
BEPR - Base End Panel Right
WEP - Wall End Panel
VBEL - Vanity Base End Panel Left
VBER - Vanity Base End Panel Right
WF - Wall Filler
FF - Fluted Tall Filler
WALL CABINETS
W- Wall Cabinet
WES - Wall End Shelf
WDC - Wall Diagonal Corner
WBC - Wall Blind Corner
WMC - Wall Microwave Cabinet
WEC - Wall End Cabinet
WES - Wall End Shelf
BATHROOM VANITIES
V - Vanity Base Cabinet
VDB - Vanity Drawer Base
VSD - Vanity Sink Combo Base
VCD - Vanity SInk Combo Double
HOODS & SPECIALTY CABINETS
RHF - Range Hood Wood
RHA - Decorative Wood Hood
NRH - Chimney Style Wood Hood
BOX - Modification Box
DECORATIVE PANELS & GLASS DOORS
RHF - Range Hood Wood
RHA - Decorative Wood Hood
NRH - Chimney Style Wood Hood
BOX - Modification Box
MOULDINGS
ACM - Top Mounted Crown Moulding
CM - Crown Moulding
CRM - Chair Rail Moulding
TLR - Decorative Light Rail
OCM - Outside Corner Moulding
SM -Scribe Moulding
BBM - Base Board Moulding
TK - Toe Kick
VALANCES, CORBELS & POST
VAL - Curved Valance
CB - Decorative Corbels
SSP - Shaker Style Post
SP - Classic Post
How To Plan My Kitchen for High-End Cabinets
We know that undertaking a design project and learning how to build kitchen cabinets can be both exciting and intimidating. Luckily, we’ll build you the beautiful, long lasting high end kitchen cabinets you’ve always wanted; you just need to measure and plan appropriately. Whether you are remodeling an existing space or starting from scratch, let us show you what to do and where to start.
Use this Step-by-Step Planning Page to start designing your perfect space. When you are finished, bring your plan to one of our Kitchen Design Professionals and you will soon be on your way to having the space you have always dreamed of, with the best kitchen cabinets you’ll find anywhere, along with our wonderful, everyday low prices.
Step 1: Measure Your Space
A good kitchen design begins with having accurate measurements. You will first want to decide what you need, what you want, and what existing items you would like to incorporate into your new kitchen.
By drawing a preliminary room outline and floor plan, you will help others understand your ideas. Don’t worry, your drawings don’t have to be works of art – just clear, simple sketches.
Supplies You Will Need:
-
25′ Retractable Steel Tape Measure
-
Pencil (preferably colored)
-
Eraser
-
Note Pad and Clipboard
-
Small Step Ladder (if possible)
How to Measure Your Kitchen
Note: All measurements should be in inches – not feet and inches.
Walls
Start in one corner and measure along the wall approximately 36″ from the floor. Measure the wall until you reach a stopping point whether it is from a break in the wall, an obstruction, or an opening. If it is a window or a door, you will want to measure all the way across the window or door, from outside of trim to outside of trim. You will also want to measure the width of the trim and note it on your drawing. Continue on to the next break, obstruction, or opening. If there is none, continue to the corner. You will want to continue this process all the way around the room. After you have measured the individual spaces on each wall, take a wall to wall measurement. This will help you to double check your measurements.
Windows & Doors
After you have measured all of the walls, you will need to get additional information for the doors and windows. You will need to measure the overall door height, including trim, as well as the door swing. You will also need to measure the overall window height including trim, as well as the distance from the floor to the window sill. It is often helpful to make a chart and label each window A, B, C, as well as each door. You can record your measurements in the chart.
Ceiling & Soffits
Your next step will be to measure the ceiling height of your kitchen. You will want to take the measurement in a few different areas to judge how level the floor is. If your kitchen currently has soffits, you will also need to measure them. You will want to measure the height as well as the distance they jut out from the wall.
Measuring Guide
Our Measuring Guide will help you to begin scoping your project. It will also help us to provide you with a preliminary estimate. Choice Cabinet will always professionally measure your space before finalizing your design and ordering your cabinetry, so remember the Measuring Guide is for estimate purposes only.